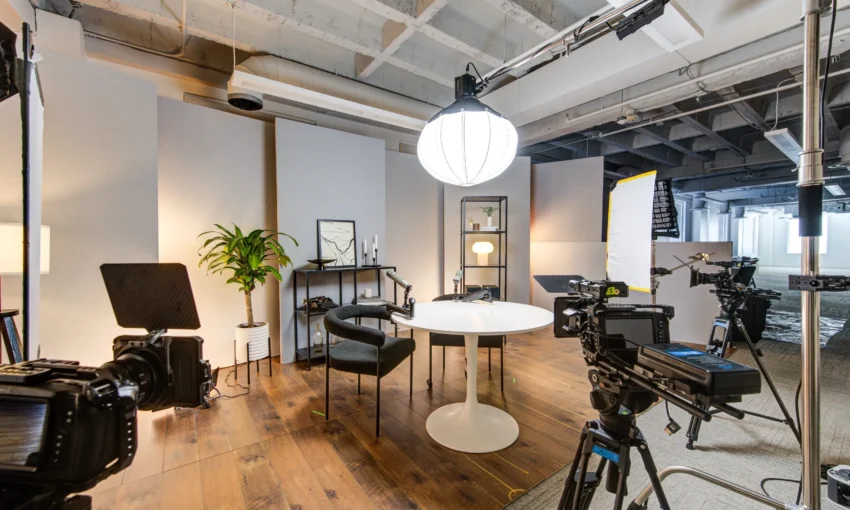
Creating a high-quality video podcast requires the right equipment, proper setup, and an effective post-production process. Whether you’re just starting or looking to improve your podcasting setup, this guide will walk you through the entire process step by step.
Choosing the Right Microphone
The microphone is the most crucial part of your podcasting setup. Here are the best options based on your budget:
- Shure SM7B ($400) – A professional dynamic mic, but requires an audio interface and a Cloudlifter (+$150).
- Shure MV7 ($250) – A USB/XLR hybrid mic that offers excellent quality at a lower cost.
- RØDE PodMic ($100) – XLR-only, solid sound but requires some EQ adjustments.
- FTF Gear Mic ($70) – USB mic with a boom arm, pop filter, and stand.
Microphone Placement Tips:
- Keep the microphone 1–2 inches away from your mouth.
- Position it slightly to the side to reduce plosives (P/B sounds).
- Use pop filters to enhance clarity.
Choosing an Audio Interface
If your microphone is USB, you don’t need an audio interface. However, for XLR mics, consider these options:
- Focusrite Scarlett Solo ($130) / 2i2 ($190) – Good for beginners but may introduce slight background noise.
- RØDECaster Pro II ($700) – Best for podcasting with built-in effects and multi-track recording.
- Apollo Twin X ($1,000) – Professional-grade interface with ultra-low noise.
For XLR cables, use Mogami for high-quality sound transmission.
Acoustic Treatment
Improving your recording environment enhances audio quality. Consider:
- Acoustic blankets ($100 each) to reduce echo.
- Foam panels or rugs to absorb sound.
- Avoid bare walls that cause reverb.
Lighting Setup for Video Podcasting
Proper lighting is essential for high-quality video. Here are the recommended setups:
Basic Lighting for Solo Podcasting
- Key Light – Aputure 300X or Amaran 200X with a 3ft softbox.
- Fill Light – Amaran 600X to soften shadows.
- Hair Light – Tube light or soft LED for background separation.
Two-Person Podcast Lighting
- Use two key lights for balanced lighting.
- Add a lantern softbox overhead for even illumination.
- Use accent lights (e.g., tube lights) for a professional touch.
Camera Setup for Video Podcasting
If you have good lighting and audio, your phone can be sufficient. However, for better quality, consider these cameras:
Budget Cameras
- Canon R50 ($700) – Basic 4K recording.
- Sony ZV-E10 ($900) – Unlimited recording time.
Mid-Range Cameras
- Canon R10 ($1,000) – 2-hour recording time.
- Sony FX30 ($1,800) – Excellent cinematic quality.
Professional Cameras
- Sony A7S III ($3,500)
- Canon C70 ($5,500)
Best Lenses for Podcasting:
- 35mm–50mm for medium shots.
- 18mm–24mm for wide-angle shots.
Essential Accessories
- Tripods: FTF Gear Tripod ($70) or Manfrotto ($200).
- Dummy Battery: Avoid switching batteries during recording.
Multi-Camera Setup & Live Switching
For a professional multi-camera podcast:
- Use two cameras, positioned 30–90 degrees apart.
- Three-camera setup:
- Main shot (center)
- Guest shot (side angle)
- Wide shot (both speakers)
- Live switching? Use an ATEM Mini Pro ($300–$600) for real-time editing.
Recording Your Podcast
Best Audio Recording Software
- GarageBand (Free, Mac)
- Adobe Audition (Paid)
- Logic Pro X (Mac, Pro Users)
- Audacity (Free, Windows/Mac/Linux)
Best Video Recording Software
- OBS Studio (Free)
- Ecamm Live (Mac, Paid)
- Riverside.fm (Remote Guests)
Editing Your Podcast
- Import Files into Adobe Premiere Pro, Final Cut Pro, or DaVinci Resolve.
- Sync Audio & Video – Use Auto-Sync in Premiere.
- Cut Between Cameras based on who is talking.
- Add Intro/Outro Music (Musicbed, Artlist.io).
- Enhance Audio with Effects:
- EQ – Adjust bass/treble.
- Compression – Balance loud/soft sounds.
- Noise Reduction – Use iZotope RX Elements.
- Normalize Audio to -14 to -18 LUFS.
Exporting & Uploading
Best Export Settings for YouTube & Spotify
- Resolution: 1080p (or 4K for higher quality)
- Format: H.264 (MP4)
- Bitrate: 10–20 Mbps for 1080p, 40 Mbps for 4K
- Frame Rate: 24/30fps
Upload to YouTube
- Add timestamps, SEO-friendly title, custom thumbnail.
- Use short clips for promotion.
Upload as a Podcast
Use Anchor.fm (Spotify for Podcasters):
- Create an account.
- Upload audio/video.
- Generate an RSS Feed for Apple Podcasts, Google, etc.
- Publish!
Conclusion
To create a professional video podcast, focus on: ✅ High-quality audio with the right mic and setup.
✅ Proper lighting to enhance video quality.
✅ A reliable camera setup with unlimited recording time.
✅ Effective editing with synced audio, camera cuts, and branding.
✅ A strong distribution strategy via YouTube & Spotify.
By following these steps, you can create a compelling video podcast that engages your audience and stands out from the competition.

