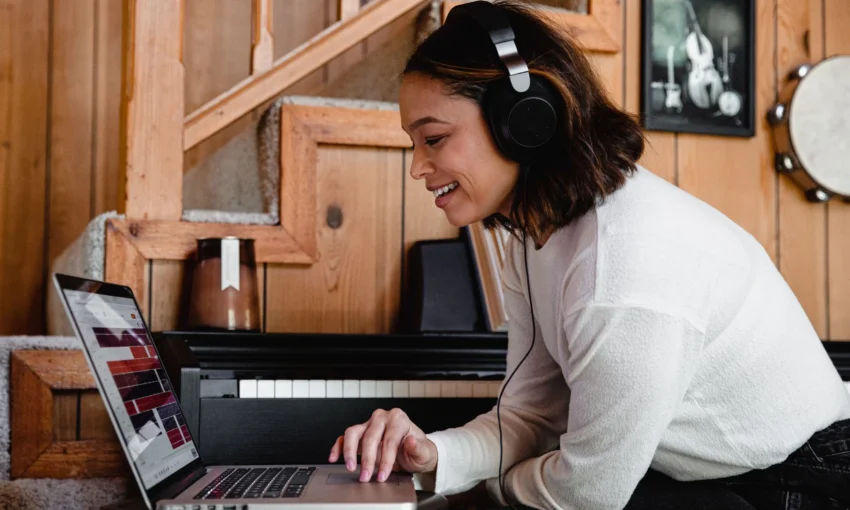
In today’s digital world, podcasting has become a powerful medium for content creators, entrepreneurs, and educators. However, conducting remote podcast interviews can be challenging due to quality issues, software limitations, and technical complexities.
This guide will help you optimize your remote podcast recording setup, ensuring high-quality audio and video while maintaining an engaging listener experience.
Why Optimize Your Remote Podcast Setup?
Before diving into the tools and techniques, let’s understand why optimizing your remote podcasting setup is crucial:
- Better Audio & Video Quality – Poor sound and visuals can lead to a loss of engagement.
- Professional Branding – A well-structured setup enhances your credibility.
- Seamless Guest Experience – Ensuring smooth interviews prevents technical hiccups.
- Higher Audience Retention – Better quality means more listeners stick around.
Now, let’s explore the top methods to optimize your remote podcast recording.
1. Choosing the Right Software for Remote Podcasting
Using the right software can improve recording quality, reduce latency, and ensure seamless interviews. Here are three popular options:
a) Video Conferencing Tools (Easy & Free)
- Zoom & Google Meet – These platforms are beginner-friendly and free.
- Pros: Easy to use, allows video recording.
- Cons: Compressed audio, lower bit rate.
b) Live Streaming Platforms (Enhanced Branding)
- Ecamm Live, OBS, Discord, & StreamYard – These allow for better visuals, branding, and real-time interactions.
- Pros: Custom branding, overlays, and guest interaction.
- Cons: Requires a premium plan for full features.
c) High-Quality Recording Software (Best Audio & Video)
- Riverside.fm, Zencastr, SquadCast – These platforms record locally on each guest’s device, ensuring studio-grade quality.
- Pros: High-fidelity audio and video, separate audio tracks.
- Cons: Subscription-based.
💡 Best Pick: If audio quality is your priority, use Riverside.fm or Zencastr over Zoom for uncompressed recordings.
2. Optimizing Your Audio Setup
High-quality audio is the most critical aspect of a podcast. Here’s how to improve it:
a) Use an External Microphone
- Avoid built-in laptop mics—use USB or XLR microphones like:
- Budget: Audio-Technica ATR2100x
- Mid-Range: Rode NT-USB
- Premium: Shure SM7B
b) Use a Pop Filter & Boom Arm
- A pop filter reduces plosive sounds (p’s and b’s).
- A boom arm helps position the mic correctly and reduces vibrations.
c) Use Headphones to Avoid Echo
- Noise-canceling headphones prevent audio bleed from speakers.
- Recommended: Audio-Technica ATH-M50x or Sony WH-1000XM4.
💡 Pro Tip: Ask guests to use earphones with a built-in mic if they don’t have a professional setup.
3. Enhancing Video Quality for Remote Podcast Interviews
If your podcast is video-based (YouTube, TikTok, or live streams), ensure the following:
a) Use a High-Quality Camera
- Budget: Logitech C920 HD Webcam
- Mid-Range: Elgato Facecam
- Pro: Sony ZV-1 or Canon EOS M50
b) Improve Lighting for a Professional Look
- Use a ring light or softbox lighting to remove harsh shadows.
- Natural lighting works best when facing a window.
c) Use a Virtual or Branded Background
- StreamYard, OBS, and Zoom allow custom backgrounds to reinforce branding.
- Avoid cluttered rooms in the background.
💡 Pro Tip: Record in 1080p or higher resolution for a polished look.
4. Ensuring a Stable Internet Connection
A poor connection leads to lags, distortions, and lost audio/video frames.
a) Use a Wired Ethernet Connection
- Wi-Fi can cause latency issues. Use an Ethernet cable for faster speeds and stability.
b) Upgrade Your Internet Speed
- Minimum upload speed: 10 Mbps
- Recommended: 30 Mbps+ for smooth recordings.
💡 Pro Tip: Use SpeedTest.net before recording to check your connection.
5. Recording & Editing for a Professional Touch
After recording, polish your podcast with proper editing.
a) Use Audio Editing Software
- Free: Audacity
- Paid: Adobe Audition, Logic Pro X
b) Remove Background Noise
- Use AI tools like Krisp.ai or Descript to filter out background noise.
c) Enhance Your Video
- Use Final Cut Pro or Premiere Pro for cutting and color grading.
💡 Pro Tip: Keep podcast episodes visually engaging by adding B-roll footage or graphics.
6. Pro Tips for a Smooth Remote Interview
✅ Pre-Test with Guests
- Check their mic, camera, and internet 15 minutes before recording.
✅ Provide Guests with Guidelines
- Send a short guide on how to set up their mic, lighting, and background.
✅ Record a Backup Audio File
- Use Riverside.fm or Zoom’s cloud recording for redundancy.
Final Thoughts
Remote podcasting doesn’t have to compromise quality. By choosing the right software, optimizing your audio/video, and ensuring a stable internet connection, you can produce professional and engaging content.
🚀 Next Steps:
- Test different podcast software and find what works best for you.
- Invest in quality mics, cameras, and lighting.
- Ensure your internet connection is stable before recording.
